

How To Repair A Turn Signal Switch
Plough signal switches have gotten complicated over the years. What once was simply a lever to activate the plough signals has added other functions: headlight dimmer, lights flashing, and even the horn button. Other stalks have also sprouted from the steering column, including wiper control and cruise command. Each addition has made changing the plow signal switch just a piddling trickier.
When the turn signal switch fails, it will probably be difficult to use at first. It might seem to be loose, or cease returning when yous complete a turn. The turn signals may terminate working, or the headlight dimming function will become intermittent.
When the turn signals terminate working, you need to troubleshoot before you start replacing expensive parts. If the switch is flopping around in your hand, information technology needs to be replaced, but other issues may originate elsewhere in the arrangement.
Materials Needed
- ½ inch drive breaker bar
- Marking pen
- Safety glasses
- Screwdrivers, Phillips and flat head
- Socket wrench set: ½ inch bulldoze and ¼ drive
- Steering wheel puller
- Torx bits
- Workshop manual
Part i of iii: Removing the steering wheel
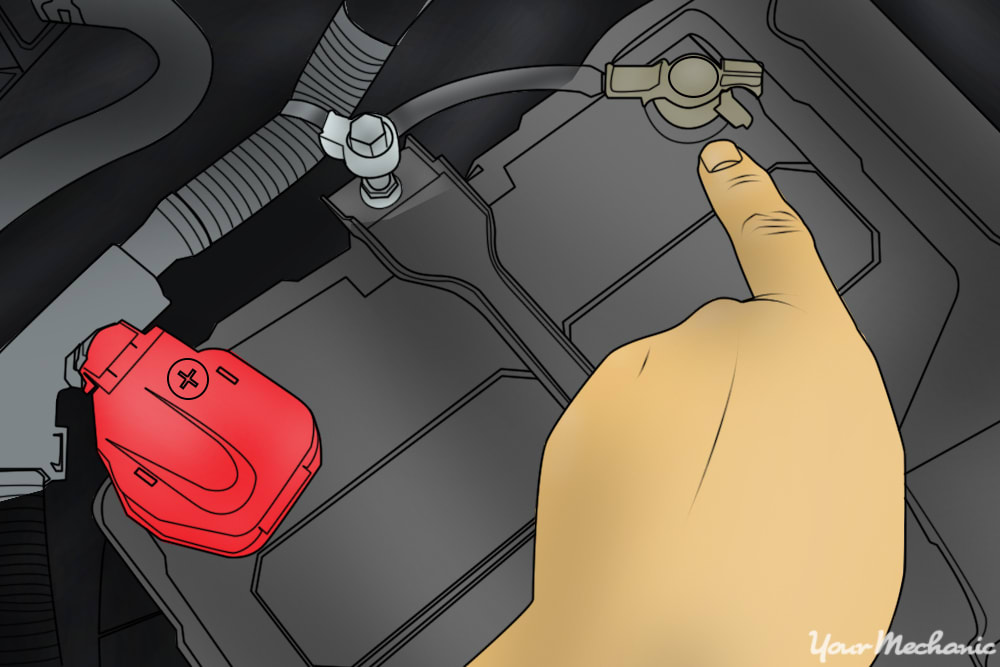
Pace 1: Disconnect the battery. If your radio has an anti-theft security code, make sure yous know what it is before proceeding. Put on your prophylactic glasses, then loosen the battery ground cable clench (commonly a x-13 mm nut) and disconnect the cablevision.
This is necessary to prevent setting an airbag code when you lot remove the steering bicycle.
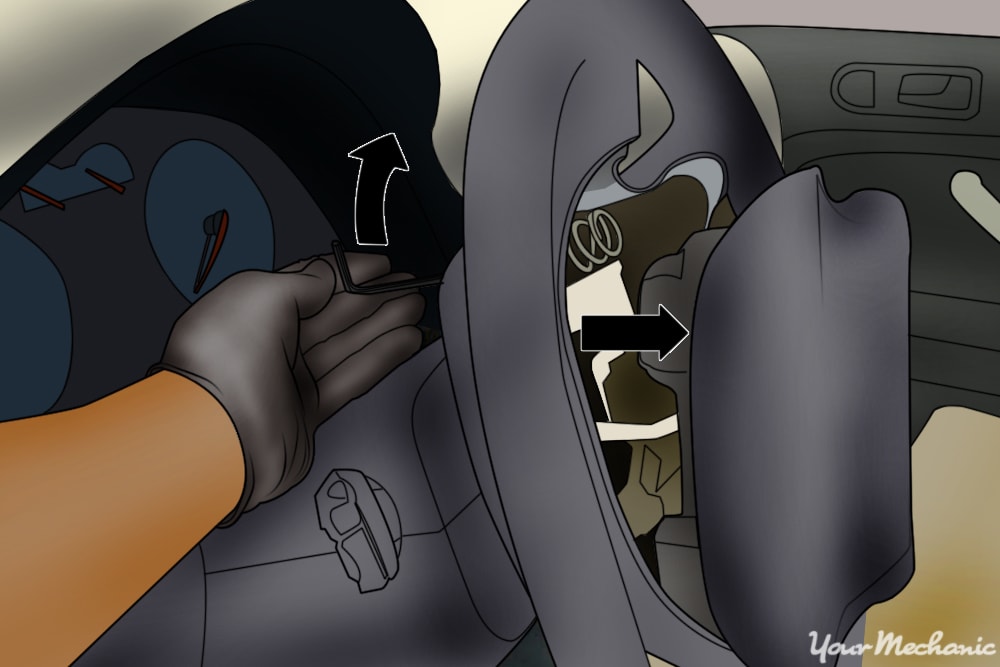
Pace 2: Remove the commuter'south side airbag. Well-nigh cars have torx fasteners holding the airbag to the steering bicycle that are accessed from the side of the steering bicycle that faces the dashboard.
Usually you can merely unscrew these fasteners, pull off the airbag insert, and disconnect a pocket-sized electric connector at the back of the airbag.
- Warning: Airbags can be dangerous! Be sure to consult your workshop transmission for the proper airbag removal procedure. Some models require that y'all practise a deactivation sequence of some kind, while others are no more than complicated than removing a horn button. Whatever it is, be sure to follow all the condom instructions for removing and treatment the airbag.
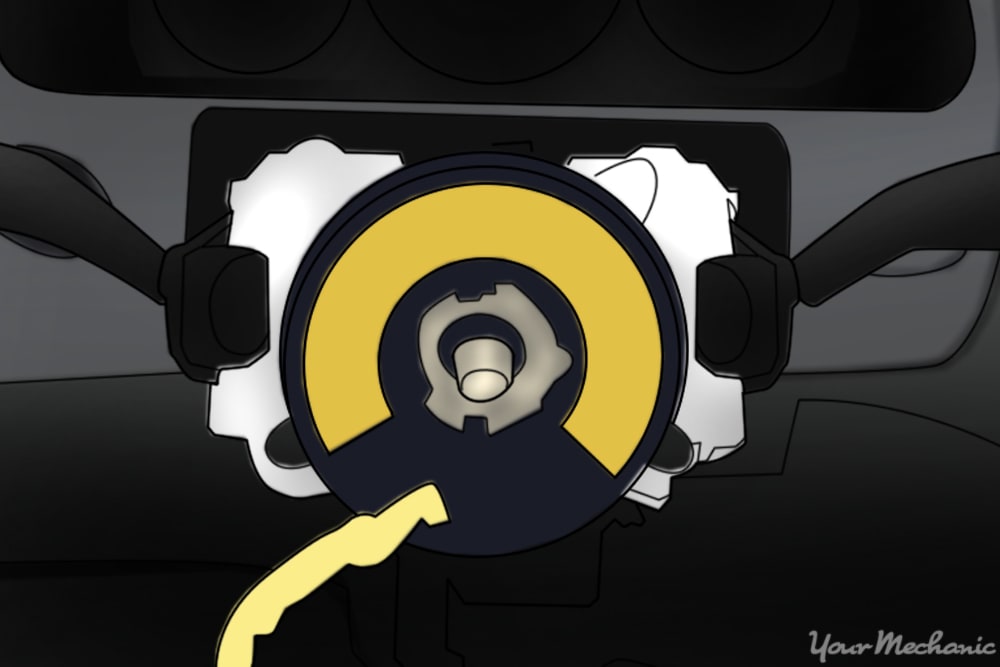
Pace 3: Remove the steering wheel. Remove the nut or bolt in the center of the steering wheel. Set the steering wheel straight alee. Mark the steering cycle and the shaft with a marker pen and then you tin can reinstall the bicycle exactly as it came off. Then try to wiggle it off.
Sometimes a few raps with the heel of the mitt are sufficient. Other times you volition have to install a steering wheel puller to produce enough force to get it off.
When it does come loose, carefully pull it off the shaft while watching for any electrical connexion that must pass through the steering wheel.
Step 4: Remove the steering cavalcade trim. How much of the trim has to exist removed varies from car to car, simply the lower half of the steering column trim most always has to come out.
Removing the steering wheel may accept exposed some screws, or all the screws might be accessed from the bottom of the column. Keep track of the screws and the positions they were in.
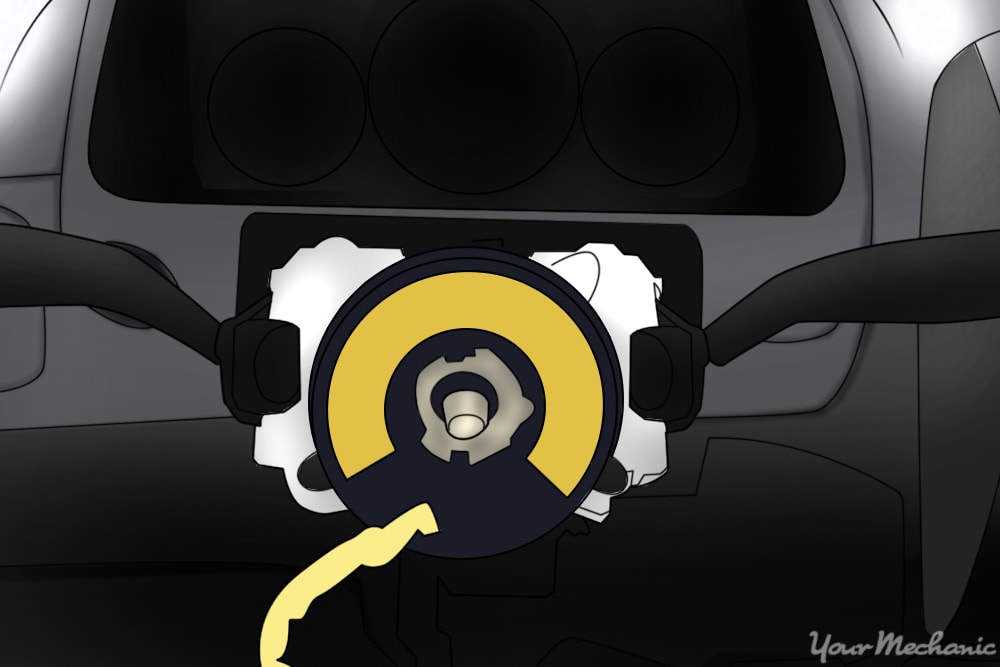
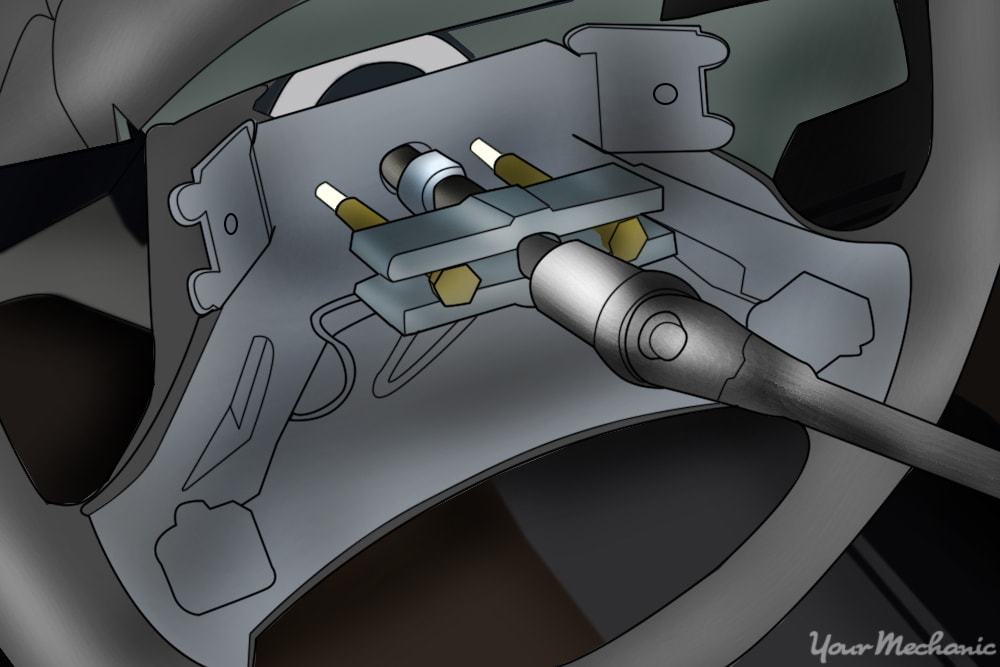
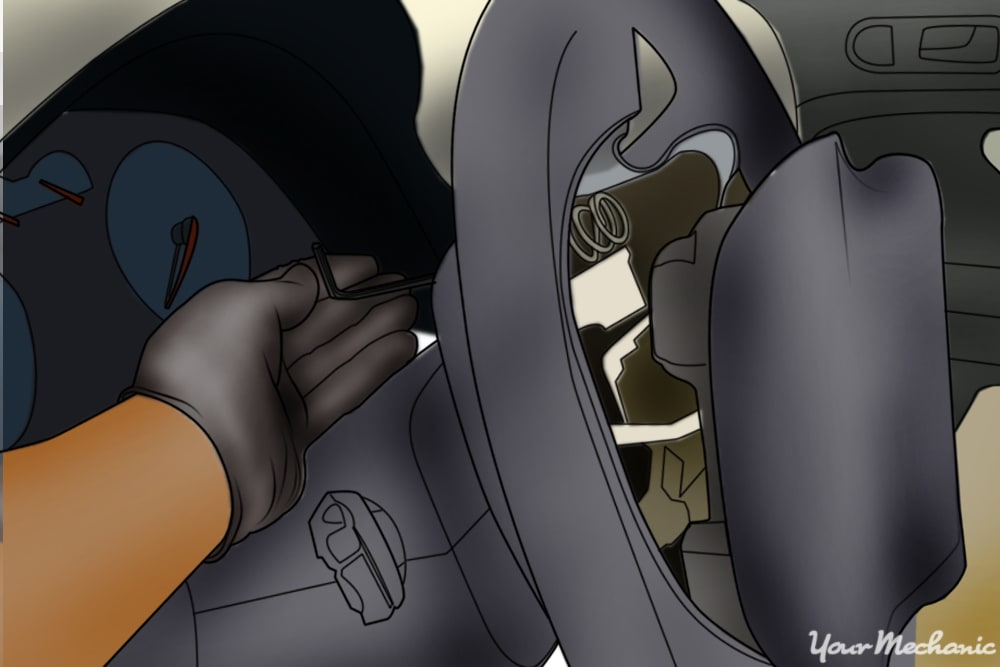
Step 5: Remove the clockspring. The next role you lot encounter volition be the clockspring. It is a plastic housing covered with alert labels.
It contains a ribbon of wire that is wound up like a loose jump that enables the steering wheel to plow total lock right and left and withal maintain a hard connexion to the airbag controller.
The clockspring may be screwed down to the steering column or it may just snap in. It will be keyed to the steering cavalcade so that it turns with the column. The electrical connector to the motorcar is commonly under the center of the column. All the connectors in the airbag electrical harness are yellow or orange to brand it easy to distinguish them from other systems in the machine.
Disconnect the harness connector and pull the clockspring straight off. Set it somewhere where it will not be disturbed. You lot don't want the eye of the clockspring to turn at all while information technology is off the steering column. Some cars have a pigsty in the clockspring for the insertion of a pivot to keep information technology from moving while it is off the car.
Role two of three: Replacing the plow signal switch

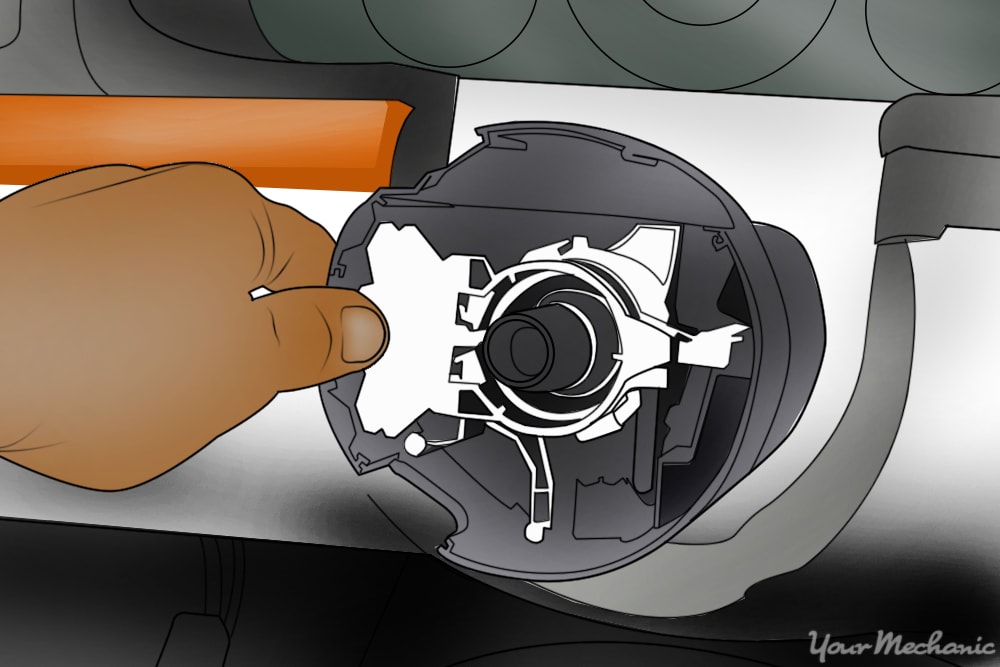
Step i: Remove the turn signal switch. The plow signal switch may exist held on by a few screws or a compression bolt around the cavalcade.
It might be a massive multi-function switch assembly, or the different switches may be detached niggling boxes that come off separately.
The column switch might disconnect right at the back, or in that location may be a wiring harness that extends downwardly the column. Wait at the back of the switch to run into what the arrangement is. There should be plenty slack that you tin pull information technology back some and leave it hanging.
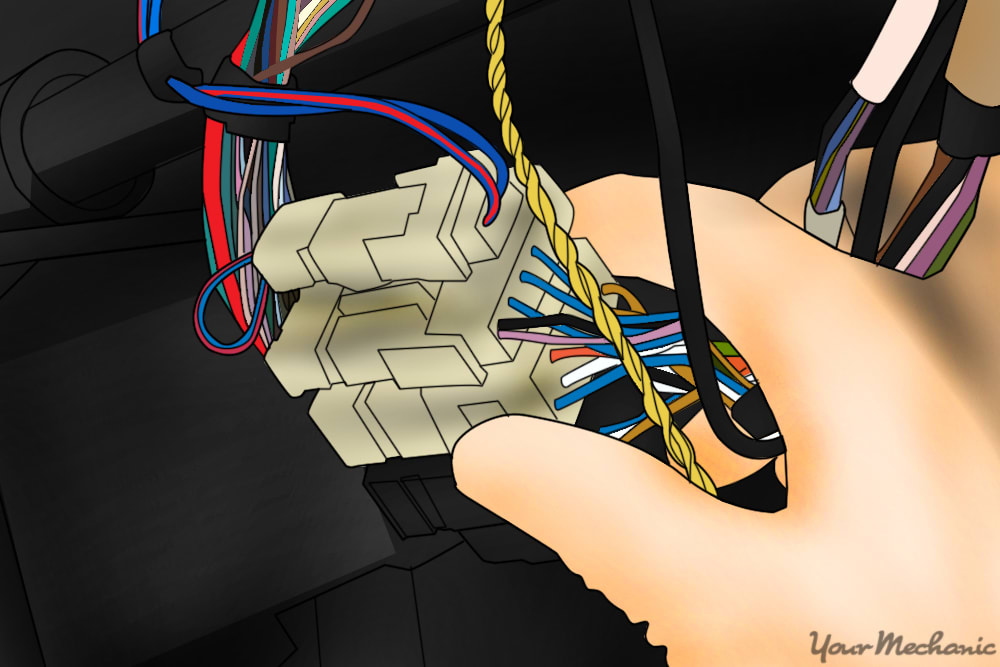
Step two: Disconnect the harness. Sometimes the harness connector will be located within the steering bicycle trim. On some cars, you may find that the harness goes all the way downwards the column into the dashboard. If that is the case, you will need to take off the lower cover panels nether the dash to admission the connectors.
At this point the harness may only drop out of the bottom of the column, or you might demand to pull it out and draw it through an opening. Pay close attention to the location of the harness and how well it is secured. Many cars with tilting steering columns let the wires a certain amount of movement and you don't want them to get caught on anything.
Step iii: Install the new switch. Fit the switch dorsum into the column and reinstall the screws. Install any other switches that you might accept had to take off as well.
- Note:If in that location were hidden fasteners on the steering wheel trim, be sure to reinstall the trim earlier going any farther.
Part 3 of 3: Reinstalling the steering wheel
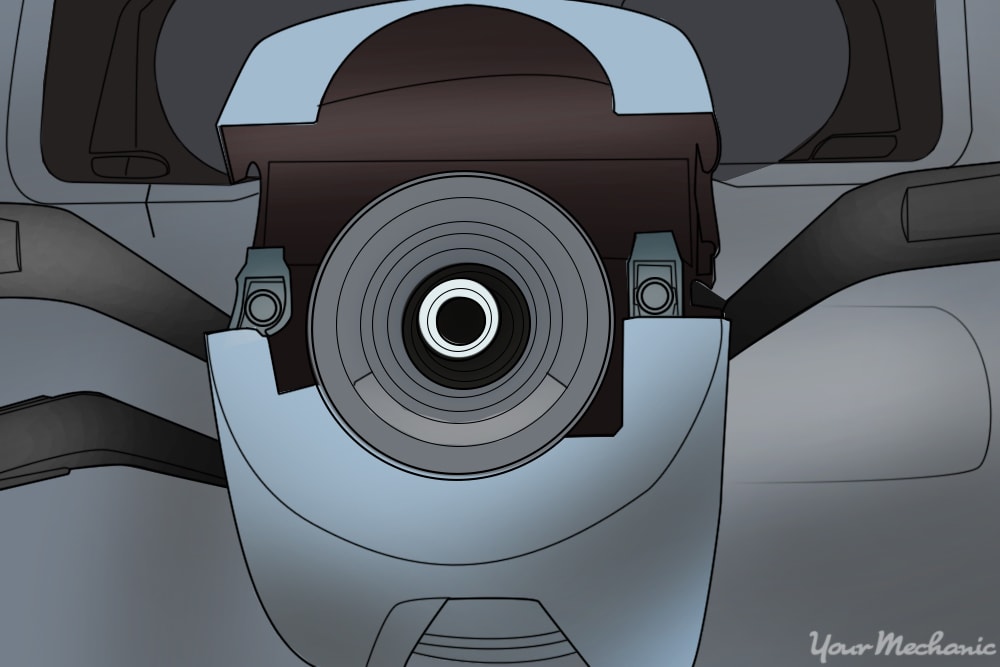
Step 1: Reinstall the clockspring. The clockspring should not accept been disturbed while you had it off, so you can simply slide it straight down on the shaft, making sure that the flats on the shaft properly engage the centre of the part.
- Annotation: If you had a pin in the clockspring, brand sure to have it out.

Step 2: Reinstall the steering cycle. Line upwardly the lucifer marks that you fabricated on the steering cycle and shaft and fit the steering wheel back onto the splines, threading the airbag wire through the appropriate holes at the same fourth dimension. Install the commodities and tighten it with a torque wrench.
- Notation: The workshop manual should have the mill specification.
Stride 3: Install the airbag. Reinstall the airbag the way it came off, making certain to connect the pocket-size two wire terminal at the back.
If there was a deactivation process, reactivate the airbag past reversing the process according to the workshop transmission.
Pace four: Test the turn signal switch. Kickoff the automobile and endeavour all the switches: turn signals, headlight dimmer, wipers, and horn. Take the car for a exam drive and cheque the cruise control.
Make note of whether there is an airbag warning light on the dashboard. If yous disconnected the battery before you began piece of work, and did non reconnect it until the airbag was plugged in, there should not be a problem. An airbag code will come up if at any point y'all had the key on while the airbag was disconnected and can simply be reset with the appropriate scan tool.
The turn signal switch tin be a handful, because everything in the steering column is packed very close together. Plus in that location is the added complication of dealing with the airbag organization. If you're worried about working with the airbag or the clockspring, or getting the steering cycle misaligned, YourMechanic can send a technician to your dwelling house or office to service your turn signal switch.
The statements expressed above are only for advisory purposes and should be independently verified. Please see our terms of service for more than details

How To Repair A Turn Signal Switch,
Source: https://www.yourmechanic.com/article/how-to-replace-a-turn-signal-switch-by-john-hege
Posted by: tranthamstess1981.blogspot.com
0 Response to "How To Repair A Turn Signal Switch"
Post a Comment